


How to Jumpstart a car with a Portable 4-in-1 Car Jump Starter
|
Model
|
GL992 12V Car Jump Starter
|
|
Capacity
|
8000mAh
|
|
HS Code
|
8507600090
|
|
Description
|
Jump starter for car, light van, motorcycle, yacht, snowmobile, cell phone, etc
|
|
Input voltage
|
5V – 2A (CC / CV)
|
|
Out Voltage
|
at auto start end 12V
|
|
USB Output
|
5V 2A
|
|
Start Current
|
300A
|
|
Peak Current
|
800A(<3s)
|
|
Charging time
|
5 times
|
|
Cycle life
|
1,000times
|
|
Operation Temp.
|
-40ºC ~65ºC
|
|
Product size
|
155.5 x 106.5 x 61.5 mm
|
|
LED light
|
Flashlight (2W, Strobe, Flash, SOS), Lighting lamp at 6W
|
|
Color
|
Black
|
| Air Pump |
Inflation pressure: 3~150psi
Inflation flow rate: 22L/min
Speed (Inflation): 0~35 psi ≤ 6 minutes at DC14.8V
|
|
Detecting pressure
|
0 ~ 150 PSI
|


How to jump-start the vehicle with an All-in-one car jump starter:
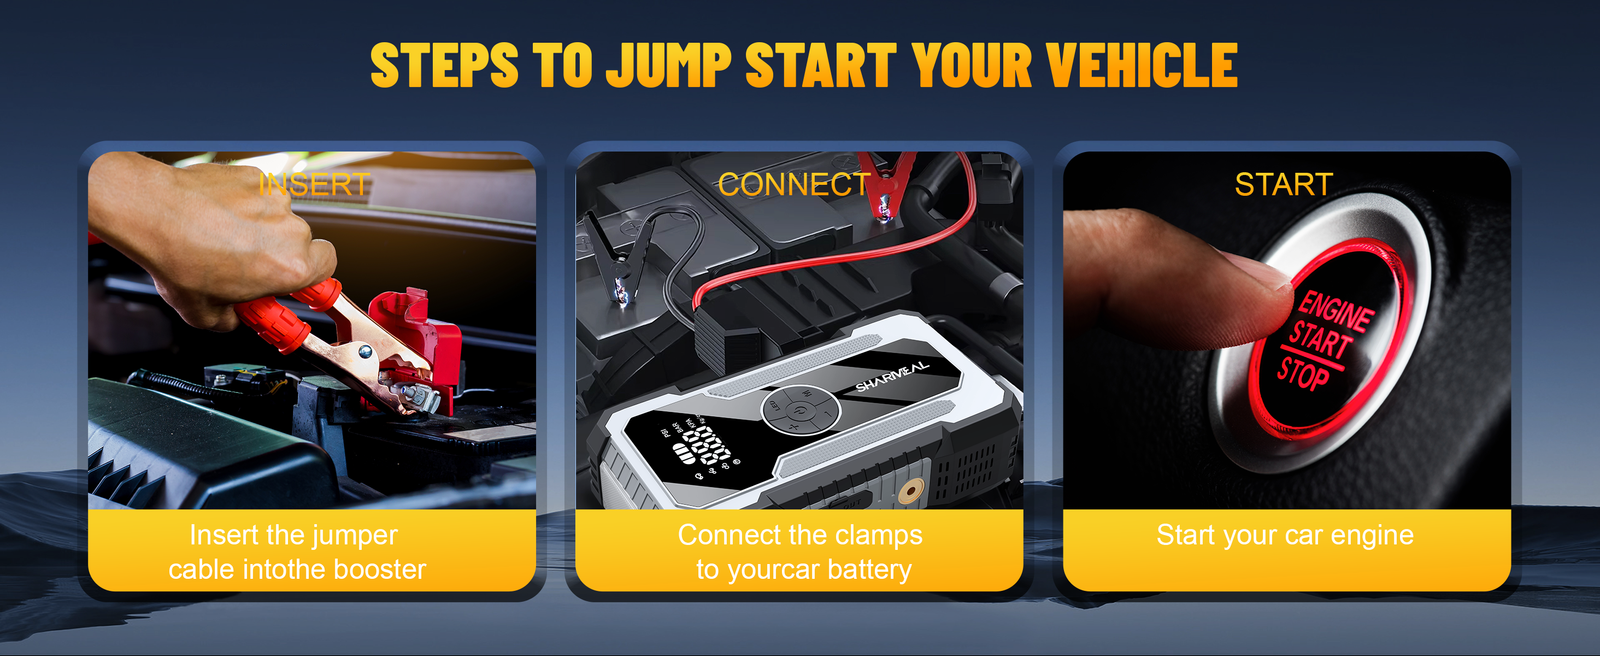
Step 1: Prepare the Jump Starter
Locate the jump-start cables: Most jump starters have integrated jumper cables. If your model requires you to attach the cables, do so.
Check indicator lights: Ensure the jump starter is ready for use, indicated by appropriate lights.
Step 2: Connect the Jump Starter
Open the vehicle’s hood: Secure it so it stays open.
Identify the battery terminals: Look for the positive (+) and negative (-) terminals on the dead battery.
Connect the cables:
Red to Positive: Attach the red clamp to the positive (+) terminal on the battery.
Black to Negative: Attach the black clamp to a stable metal surface on the vehicle (the negative terminal if it’s safe and accessible; otherwise, use a ground point to minimize sparks).
Step 3: Start the Vehicle
Turn on the jump starter: Some models require you to power on the device.
Start your vehicle: Attempt to turn on the ignition. You may need to try several times. Do not crank the engine for more than 5-10 seconds at a time; wait a minute if it doesn’t start.
Listen for the engine: Once the engine starts, allow it to run for a few minutes to recharge the battery further.
Step 4: Disconnect the Jump Starter
Remove the clamps: Start with the black (negative) clamp, then the red (positive) clamp. Be cautious not to let the clamps touch each other while removing.
Close the vehicle’s hood: Ensure everything is secure.
Step 5: Recharge the Jump Starter
After use, plug in your jump starter to charge it fully for future use.
Safety Tips
Avoid sparks: Be cautious to avoid generating sparks near the battery.
Check for damage: Inspect both the jump starter and the vehicle’s battery for any damage before beginning.
Read the manual: Different jump starters might have specific instructions or safety warnings.


